Solved
Extra space on smartcrop images - AEM cloud
Hi Team,
Smart Crop Profiles Adding Space top & bottom + Changing dimension.
any suggestions how to fix this please?
Thanks!
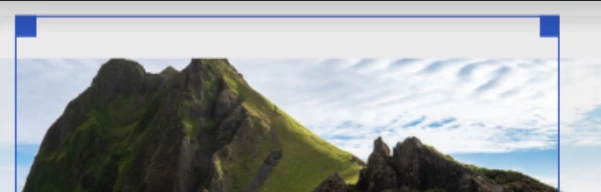
Hi Team,
Smart Crop Profiles Adding Space top & bottom + Changing dimension.
any suggestions how to fix this please?
Thanks!
Hi,
To add space at the top and bottom of an image using Smart Crop Profiles in AEM, and also change the dimensions, you can follow these steps:
Open the AEM Assets console and navigate to the image for which you want to apply the Smart Crop Profile.
Click on the image to open the asset details page.
In the asset details page, click on the "Crop" button to open the Smart Crop editor.
In the Smart Crop editor, adjust the crop handles to include the desired space at the top and bottom of the image. You can drag the handles or enter specific values in the dimensions settings.
Once you have adjusted the crop, click on the "Save" button to save the Smart Crop Profile.
Now, when you use the image with the Smart Crop Profile in your components, it will display with the specified space at the top and bottom, as well as the changed dimensions.
By following these steps, you can customize the Smart Crop Profile to add space at the top and bottom of the image and adjust its dimensions according to your requirements.
Enter your E-mail address. We'll send you an e-mail with instructions to reset your password.